As soon as I finished my 1st project, I had some dissatisfactory feeling.
nobu-macsuzuki.hatenablog.com
Kwumsy K2 mod was a very nice form factor, but it was terribly under performance because of the available space for SBC.
Later I updated the SBC to Raspberry Pi CM4, it could not resolve my dissatisfaction.
I wanna run Windows 11.
It triggered my next project - Kwumsy K3 mod.
I bought Kwumsy K3, and opened it soon after the last project was completed.
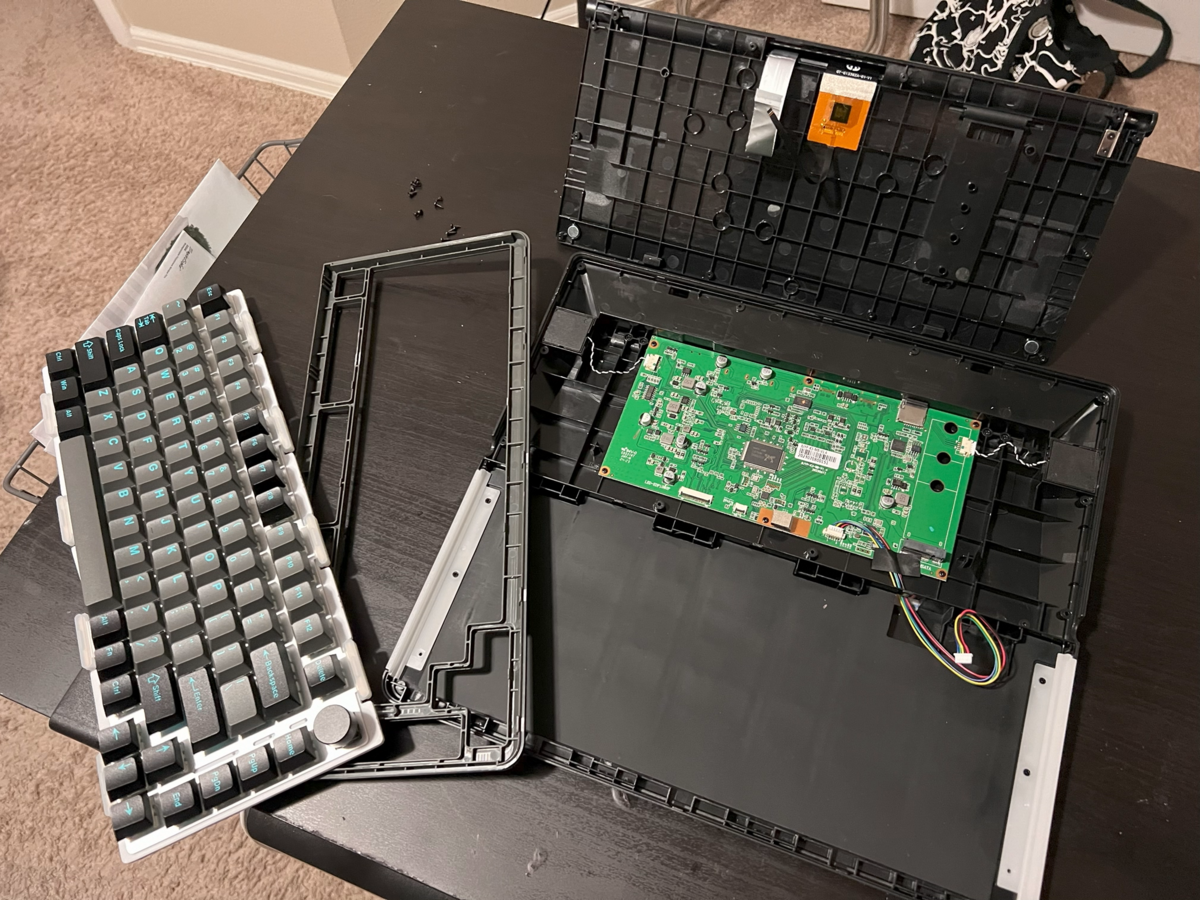
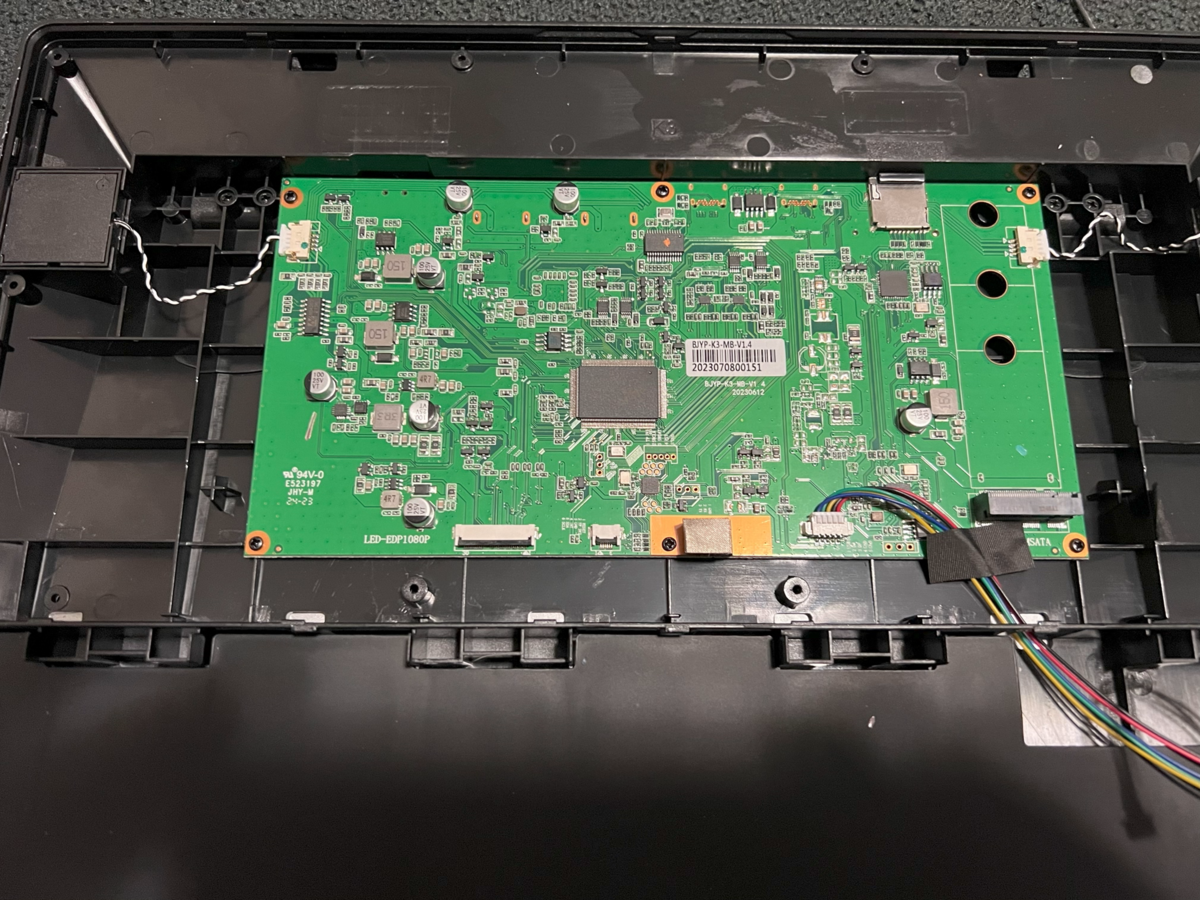
While it had a quite marginal floor plan, it wasn't enough to settle Intel / AMD SBC, as the MBs are bigger, much bigger than Raspberry Pi.
I made a rough plan.
- No special cable in the project - there is not sufficient space to shift the Kwumsy K3 controller, to harness HDMI/USB/Power Supply as I did last time
- USB-C only connection from SBC to Kwumsy K3 body - it simplifies the connection, and makes it slim too.
- SBC to be stacked on Kwumsy K3 controller, or to be placed under keyboard, depending on the thickness
I was looking for several options, to come up with the NUC.
www.amazon.com
It mounts Intel Alder Lake N100 CPU, with 16GB DDR-SDRM & 256GB eMMC, it is sufficient to run Windows 11.
It has the full USB-C, supporting power supply to Kwumsy K3 and DP alternate mode connection, unlike all others requires USB and HDMI - 2 cable connections.
It is thin, and has a potential, that I can stack it on the Kwumsy K3 controller, whilst it isn't slim enough to settle down under the keyboard.
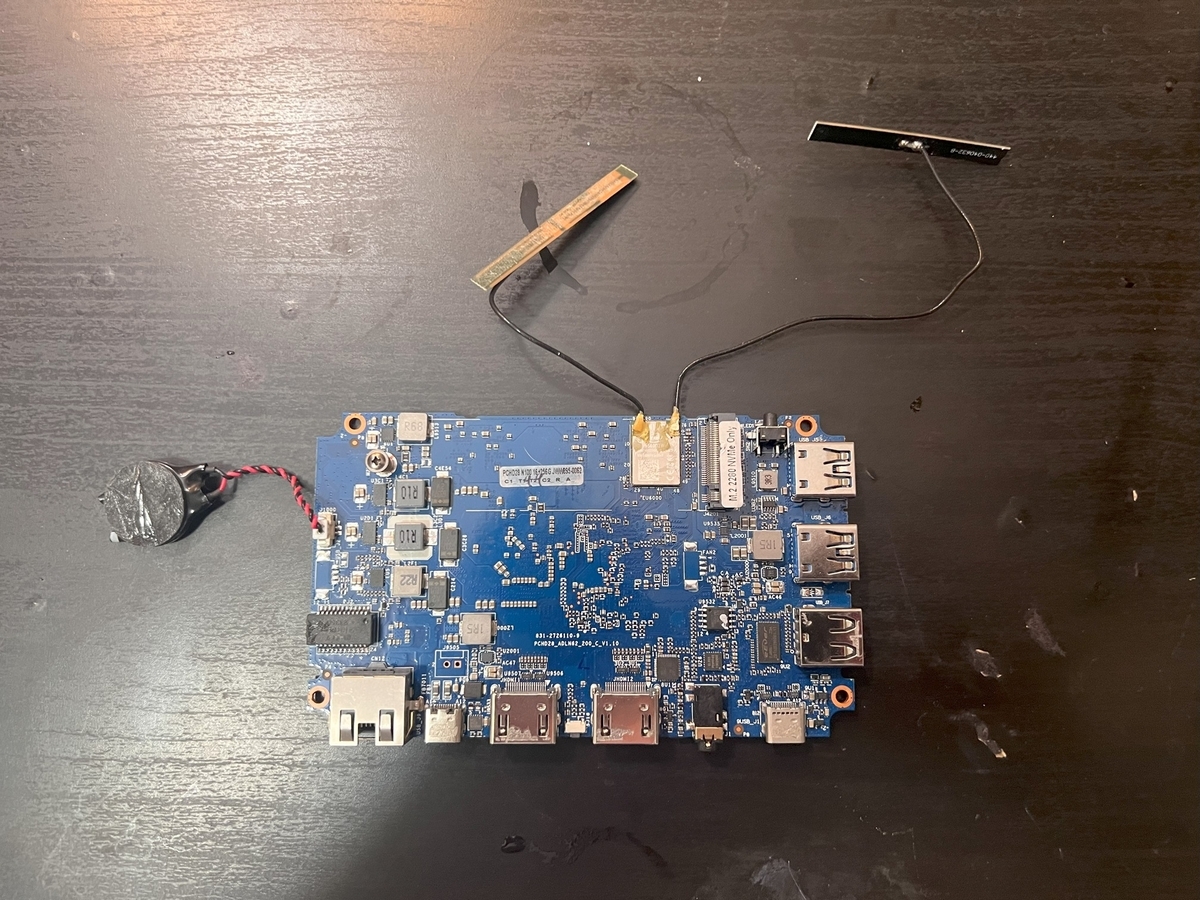
The first thing I did was to remove all unnecessary connectivity, RJ-45, USB-A connectors.
The next was to settle the power supply, a battery charging system.
The N100 SBC needs 12V supply, meaning it needs at least 3 series connected Li-ion battery cell.
I was ambitious to put 16850 3 cell in the beginnning.
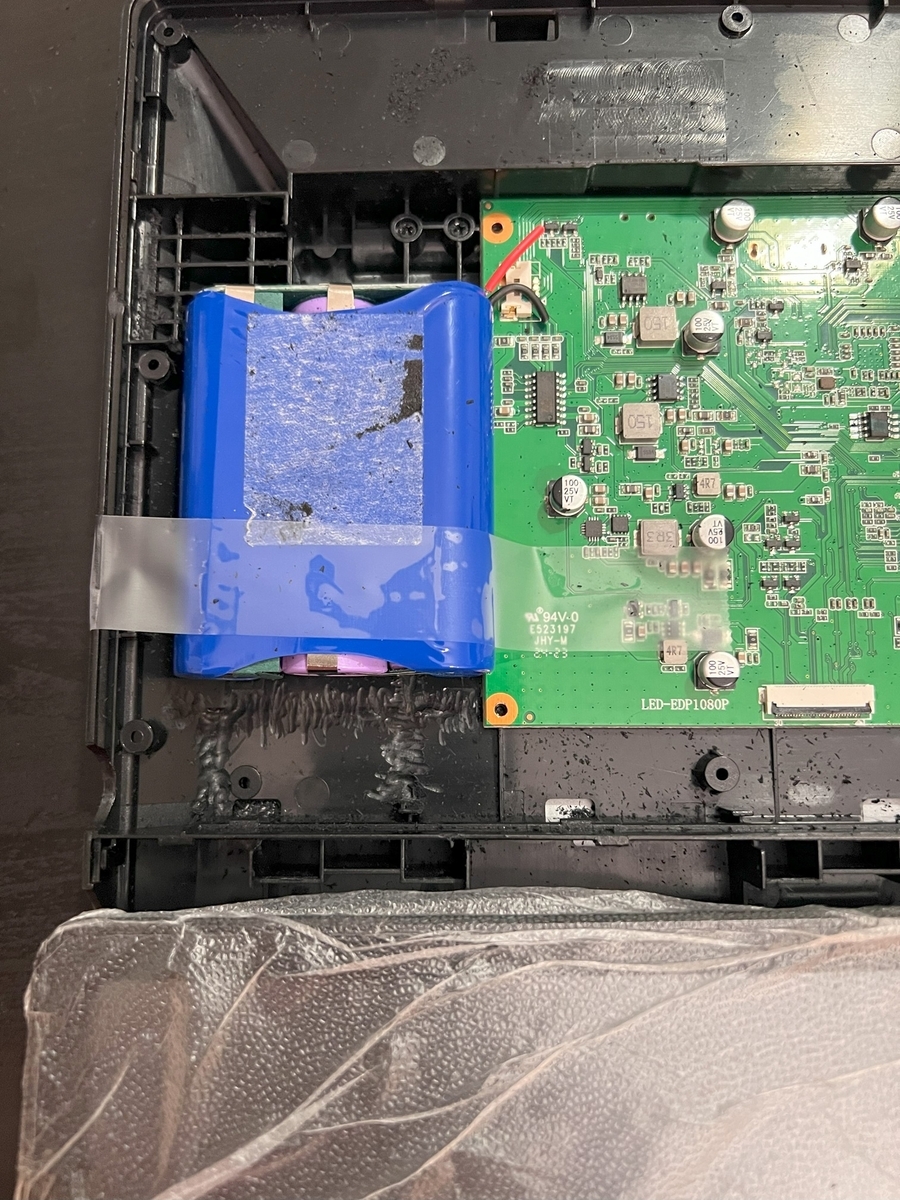
And - it did not fit int to body.
I trimmed everywhere of the Kwumsy K3 body, but it didn't.
I finally gave up to transplant off-the-shelf 16850 battery pack, and made a custom 16340 x 3cell re-chargeable battery system.
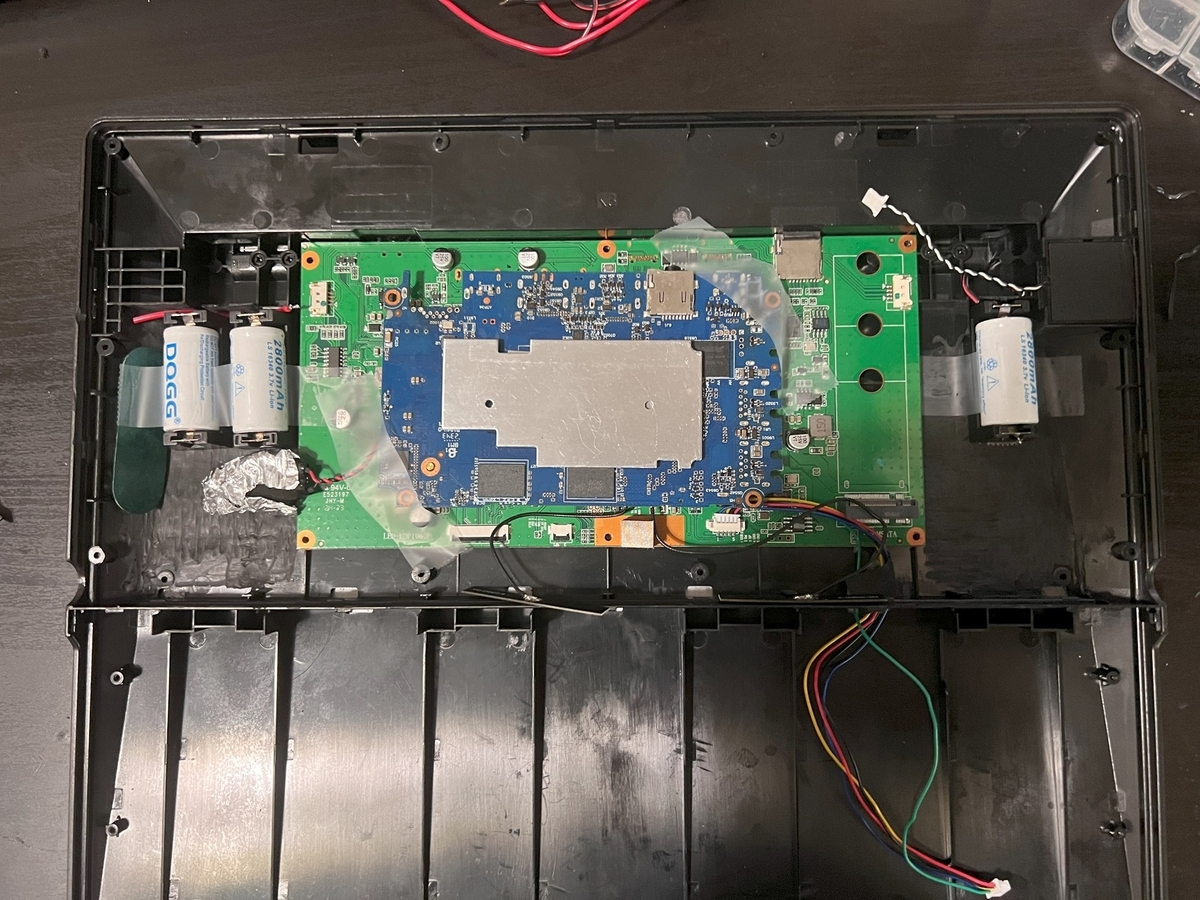
Concerning trimming, I removed many libs / pillars from the main body as well as the cover, to settle all the parts in.
I can share some of photo - it was really heavy trimming.
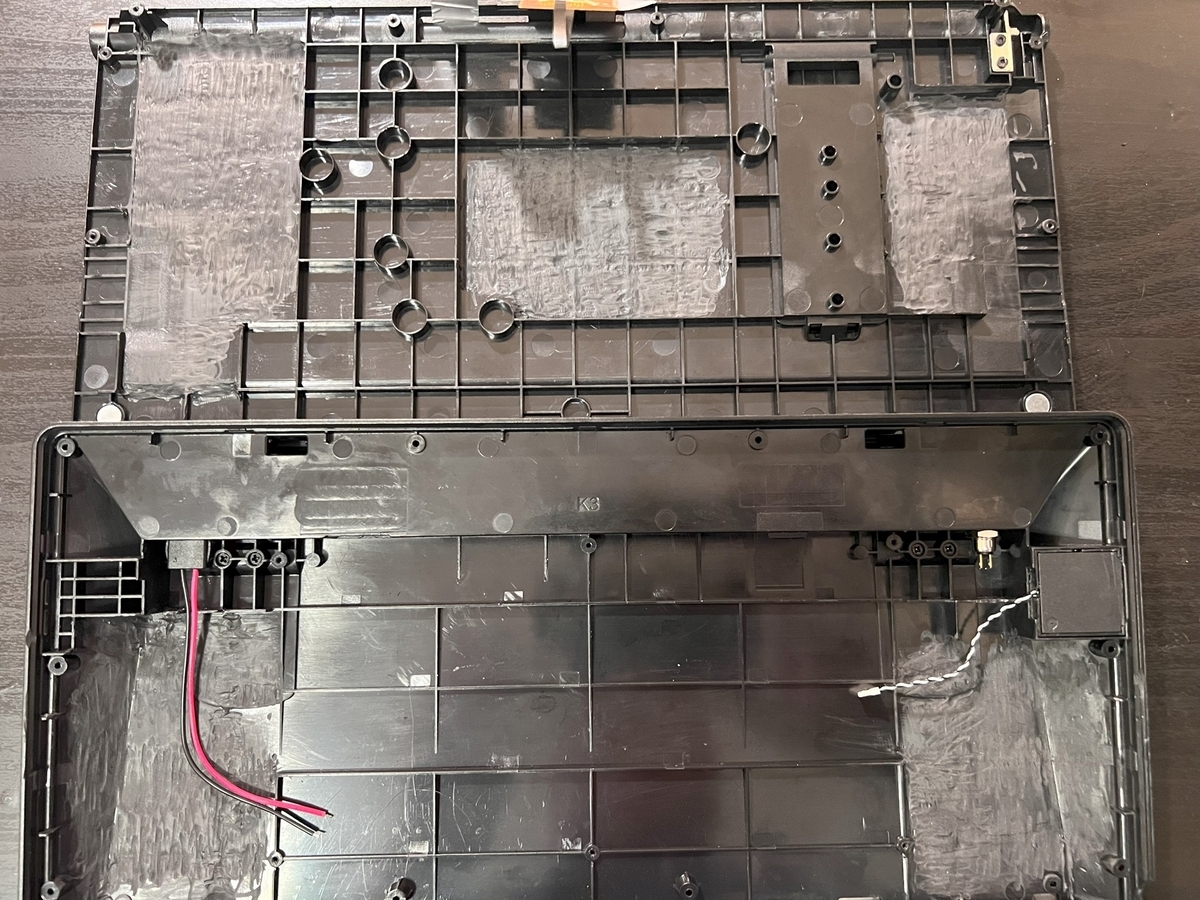
In main body, both left and right of the main PCB were completely flatten down, left speaker box was even 1/4 trimmed out.
In the cover, the sections which can conflict to the SBC and batteries were all flatten down (and something more later).
It allowed me finally to close the cover, after a very heavy mechanical trimming.
This is the final floor plan.
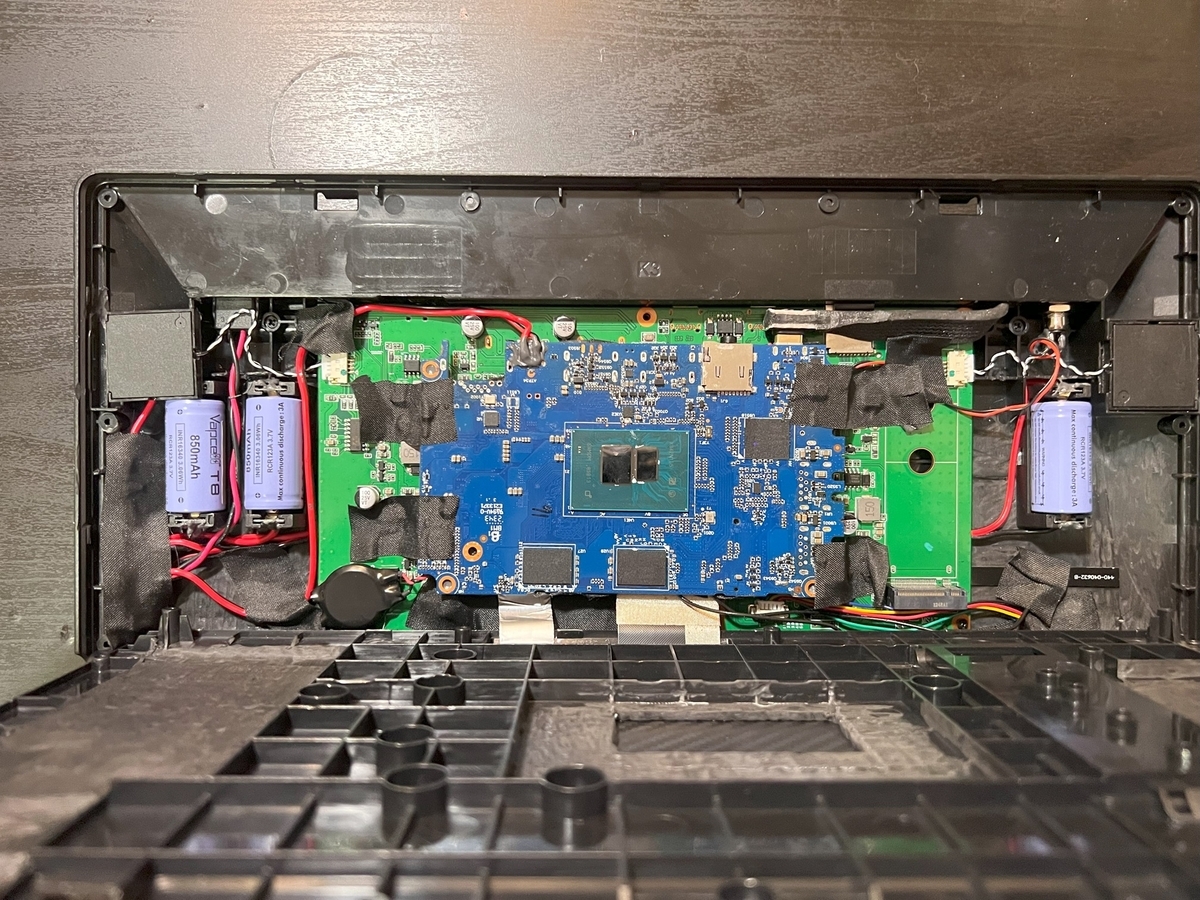
The N100 SBC is stacked over the Kwumsy K3 controller.
I install a couple of low pillars, and antistatic-tape the back of the SBC, so as it won't short to the controller.
2 of 16340 cells are placed in west with 3s battery charger board (which is under black tape), one is in east side.
The charging port is placed in the very northwest of body, next to left speaker.
The power toggle button for the N100 SBC is placed in the northeast corner.
Only one USB-C cable is out from the N100 SBC, which is connected to the Kwumsy K3 controller out of the body via USB-C port.
It wasn't the end of the story unfortunately - I needed to fight the CPU heat for a couple of weeks.
N100 TDP is 6W, which is enormous compared with Raspberry Pi.
I initially put aluminum plate which came with SBC, which wasn't sufficient in the closed body.
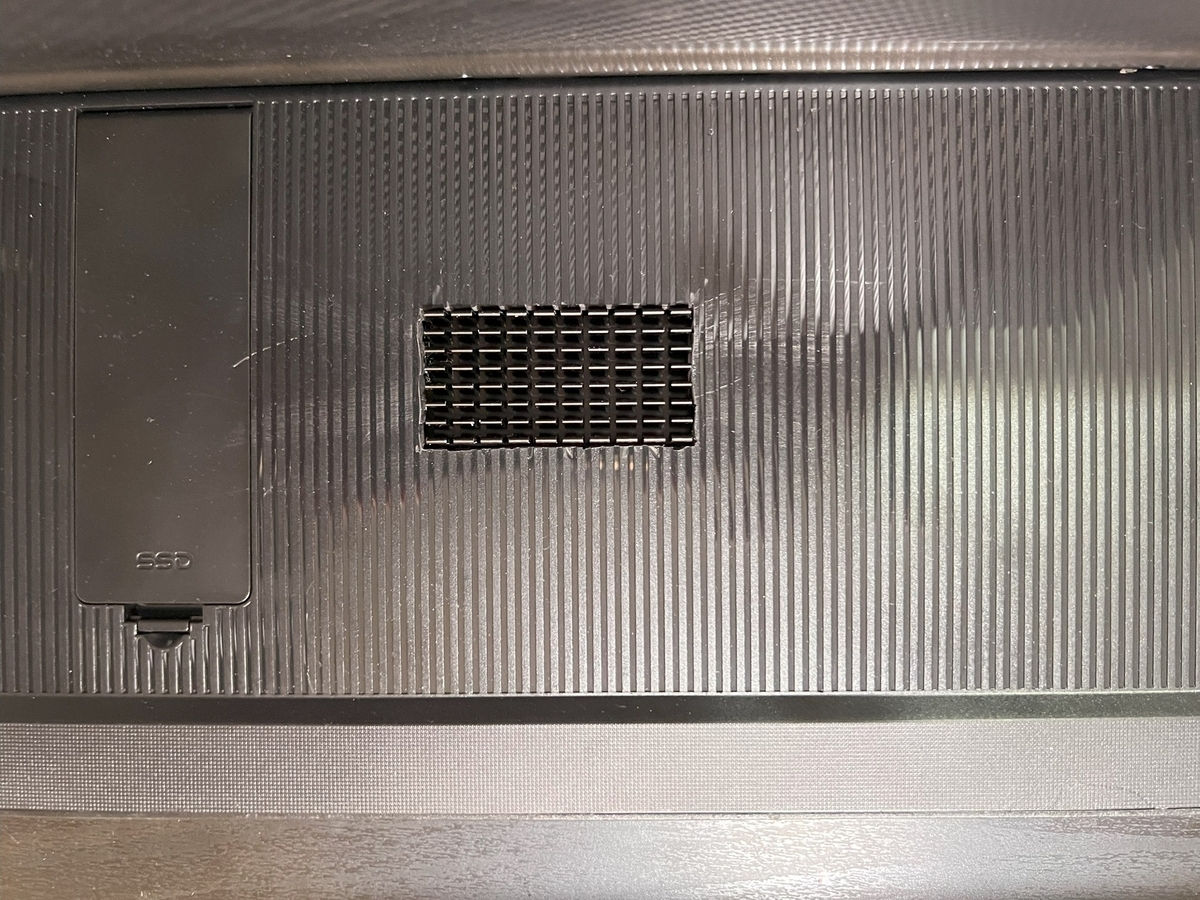
I opened the cover 50x25mm^2, and settled down the passive heat sink.
It wasn't even sufficient - as soon as Windows Update starts, the CPU was shutting down by overheat, as the TURBO throttling tried to crank up the CPU to 2.xGHx operation, oh damn, Windows is so demanding.
After all things tried, I gave up the passive solution, settling down 50x25mm^2 5V fan.
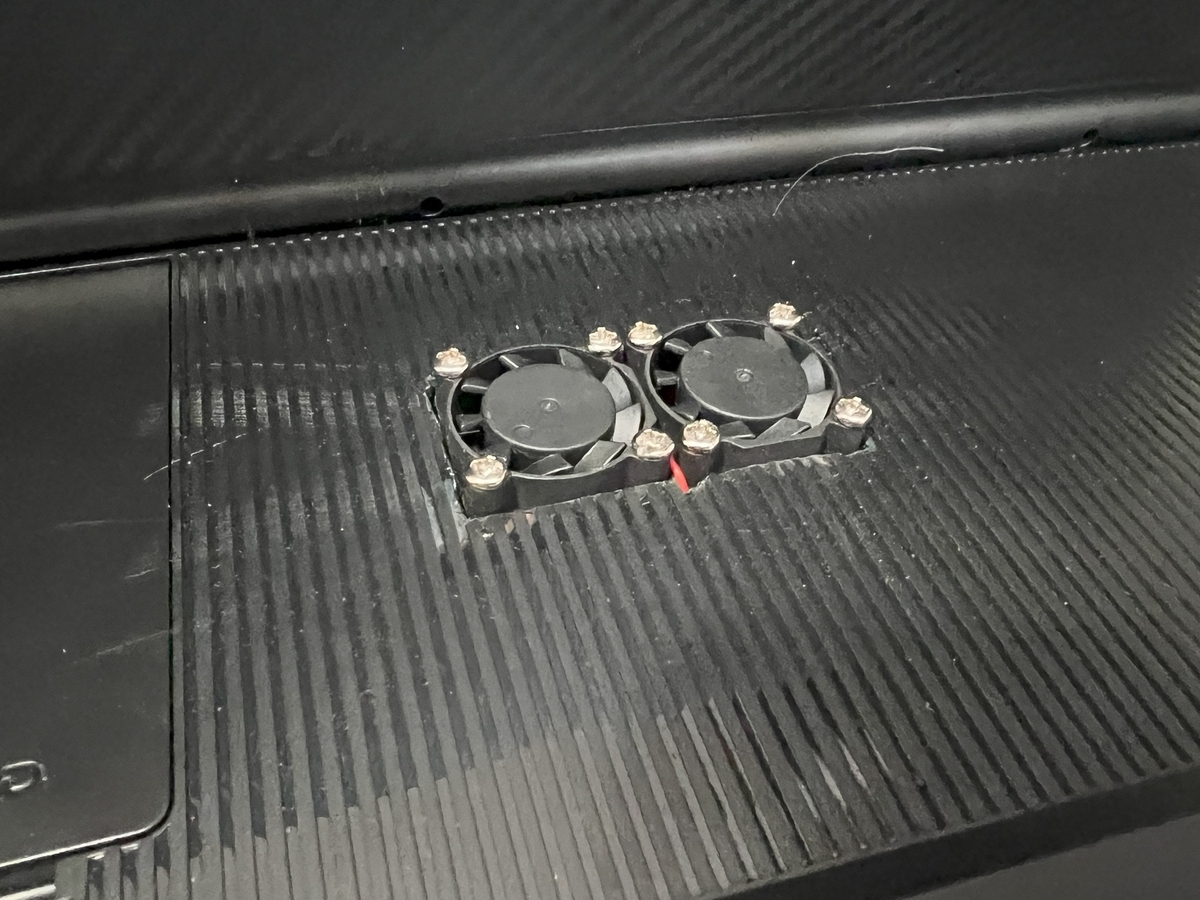
It works very nicely, even N100 goes up to full speed, it can nicely cool down the CPU.
