さて、GalileoといえばIntel、IntelといえばMSFT、MSFTといえばWindowsである。
ということで、Windows For IoTを初めてみることにした。
手順としては、
- ホストPCのVS2013にWindows Developer Program For IoTを追加
- PCホストでtelnetを使用できるようにする
- ホストPCを使いGalileoでmicro SDからWindowsをブートできるイメージを作成
- Galileoをmicro SDのWindowsイメージでブート、接続試験
- VS2013でプロジェクトを作成(Lチカ)
- リモートデバッグでGalileoで実行
だ。
ホストPCとGalileoの間は1000BASE-Tクロスケーブルを使用した。
(ストレートでもできるらしい)
なお筆者の環境は、
- ホストPC
- Vaio Tap 11 P-3560Y
- Winodws 8.1 64bit
- Visual Studio 2013 Professional
- Galileo
- GEN2
- FW1.0.3
である。
Visual StudioにWindows Developer Program For IoTを追加
まずはここから、https://ms-iot.github.io/content/
筆者はすでにMicrosoftアカウントを保有しており、かつWindows IoT Developerに登録済であった。
これらを持っていない方はまずこれらの登録が必要だ。
次にhttps://connect.microsoft.com/directory/から"Windows Developer Program for IoT"に参加する。
ライセンス同意書に答えると、晴れて諸ツールがダウンロードできるようになる。
http://ms-iot.github.io/content/SetupPC.htmから、自分のVisual Studioのバージョンに当てはまる導入方法を選択する。
筆者はProfessionalなので、WindowsDeveloperProgramforIOT.msiをダウソして、それをそのままインストールすればおしまいであった。
Galileoでmicro SDからWindowsをブートできるイメージを作成
次にhttp://ms-iot.github.io/content/SetupGalileo.htmから、"apply-BootMedia.cmd"と"Windows Developer Program For IoT – Windows Image(WIM)"をダウソする。
WIMはGalileoのジェネレーションによって異なるので注意。
ダウソが終わったら、両方ともc:\tempなど適当なワークディレクトリに移動する。
16GB以上のmicro SDカードをFAT32でフォーマットして、準備しておく。
コマンドプロンプトを開き、ワークディレクトリを開く。
呪文は"apply-BootMedia.cmd -destination (micro SDカードのルートディレクトリーのパス) -image (WIMのファイル名) -hostname mygalileo -password admin"だ。
作成時間は20-30分ほどだ、下記がログになる。
Microsoft Windows [Version 6.3.9600]
(c) 2013 Microsoft Corporation. All rights reserved.C:\temp>apply-BootMedia.cmd -destination e:\ -image 9600.16384.x86fre.winblue_rtm_iotbuild.140925-1000_galileo_v2.wim -hostname mygalileo -password admin
C:\temp>rem
C:\temp>rem Copyright (c) Microsoft Open Technologies, Inc. All rights reserved.
C:\temp>rem Licensed under the BSD 2-Clause License.
C:\temp>rem See License.txt in the project root for license information.
C:\temp>rem
Temporary changing time zone to 'Pacific Standard Time'
Fat32 is local time based, and the images are created in a pacific time zone. If there is a mismatch Windows will bug check after 5 minutes.
Set-up work folder: C:\Users\Nobuyuki\AppData\Local\Temp\apply-BootMedia-9086
Retrieveing C:\temp\9600.16384.x86fre.winblue_rtm_iotbuild.140925-1000_galileo_v2.wim to C:\Users\Nobuyuki\AppData\Local\Temp\apply-BootMedia-9086展開イメージのサービスと管理ツール
バージョン: 6.3.9600.17031イメージをマウントしています
[==========================100.0%==========================]
操作は正常に完了しました。
Customizing image C:\Users\Nobuyuki\AppData\Local\Temp\apply-BootMedia-9086\9600.16384.x86fre.winblue_rtm_iotbuild.140925-1000_galileo_v2.wim mounted at C:\Users\Nobuyuki\AppData\Local\Temp\apply-BootMedia-9086\9600.16384.x86fre.winblue_rtm_iotbuild.140925-1000_galileo_v2.wim.mount展開イメージのサービスと管理ツール
バージョン: 6.3.9600.17031イメージを保存しています
[==========================100.0%==========================]
イメージのマウントを解除しています
[==========================100.0%==========================]
操作は正常に完了しました。
Applying image C:\Users\Nobuyuki\AppData\Local\Temp\apply-BootMedia-9086\9600.16384.x86fre.winblue_rtm_iotbuild.140925-1000_galileo_v2.wim to e:\展開イメージのサービスと管理ツール
バージョン: 6.3.9600.17031イメージを適用しています
[==========================100.0%==========================]
操作は正常に完了しました。
Mounting e:\\Windows\System32\config\SYSTEM to HKEY_USERS\Galileo-9086-SYSTEM
Setting hostname to mygalileo
Restoring time zone to 'Pacific Standard Time'
Successfully applied C:\temp\9600.16384.x86fre.winblue_rtm_iotbuild.140925-1000_galileo_v2.wim to e:\
hostname: mygalileo
timezone: Pacific Standard Time
Username: Administrator
Password: admin
Done.
C:\temp>
ホストPCでtelnetクライアントを利用できるようにする
コントロールパネル -> プログラムと機能 -> Windowsの機能の有効化または無効化 -> "Telnet クライアント"にチェックを入れて、"OK"を押す。
一度ホストPCを再起動する。
Galileoをmicro SDのWindowsイメージでブート、接続試験
- ホストPCとGalileoを1000BASE-Tクロスケーブルで接続
- GalileoにWIMを作ったmicro SDを挿す
- Galileoの電源を投入
しばらくすれば、Galileoが起動する。
何、起動したかどうか分からない?
pingを打って(コマンドプロンプトで"ping mygalileo")、返ってくるか確認してください。
以下が接続確認。
- ホストPCでコマンドプロンプトを管理者モードで開く
- "telnet mygalileo"、UsernameとPasswordは上記のログの通り
- 念のため接続したら"hostname"として"mygalileo"と返ってくれば、間違いなくGalileoに接続中
- シャットダウンするのには"shutdown /s /t 0"、telnetを解除するのには"exit"
Galileoはきちっとシャットダウンしないと、次回のブートに時間が掛かる(と言ってもVSとの接続中によくハングするんだけどね)
VS2013でプロジェクトを作成
ホストPCでVisual Studioを開き、新規プロジェクトを作成する。
Wizardで"Visual C++" -> "Windows For IoT"を選択する。
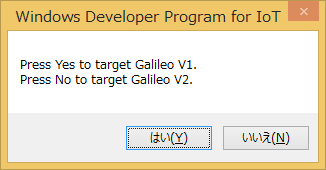
プロジェクトを作成する際に下記のように、Galileoのジェネレーションの指定が必要だ。

テンプレートで、下記のようなArduino Sketch用の"Main.cpp"を作成してくれる。
// Main.cpp : Defines the entry point for the console application.
//#include "stdafx.h"
#include "arduino.h"int _tmain(int argc, _TCHAR* argv[])
{
return RunArduinoSketch();
}int led = 13; // This is the pin the LED is attached to.
void setup()
{
// TODO: Add your code here
pinMode(led, OUTPUT); // Configure the pin for OUTPUT so you can turn on the LED.
}// the loop routine runs over and over again forever:
void loop()
{
// TODO: Add your code heredigitalWrite(led, LOW); // turn the LED off by making the voltage LOW
Log(L"LED OFF\n");
delay(1000); // wait for a second
digitalWrite(led, HIGH); // turn the LED on by making the voltage HIGH
Log(L"LED ON\n");
delay(1000); // wait for a second
}
リモートデバッグでGalileoで実行
通常"Start"と緑矢印と共に表示されているボタンが"Remote Windows Debugger"となっているので、これを押す。
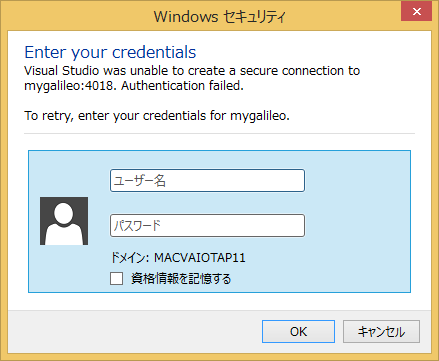
プロジェクトがビルドされた後、下記のように接続のプロンプトが表示される。

UsernameとPasswordはtelnetのときと同じだ。
そして接続が完了すると、実行が始まる。

intel Intel Galileo2 Board(開発向けボード)
- 出版社/メーカー: Intel
- メディア: Personal Computers
- この商品を含むブログを見る